Ready or Not allows players to install compatible mods on their devices to further enhance the gameplay experience. In this guide, I’ve described how you can use the Gunfighter mod after the1.0 launch update.
How to install the Gunfighter mod in Ready or Not
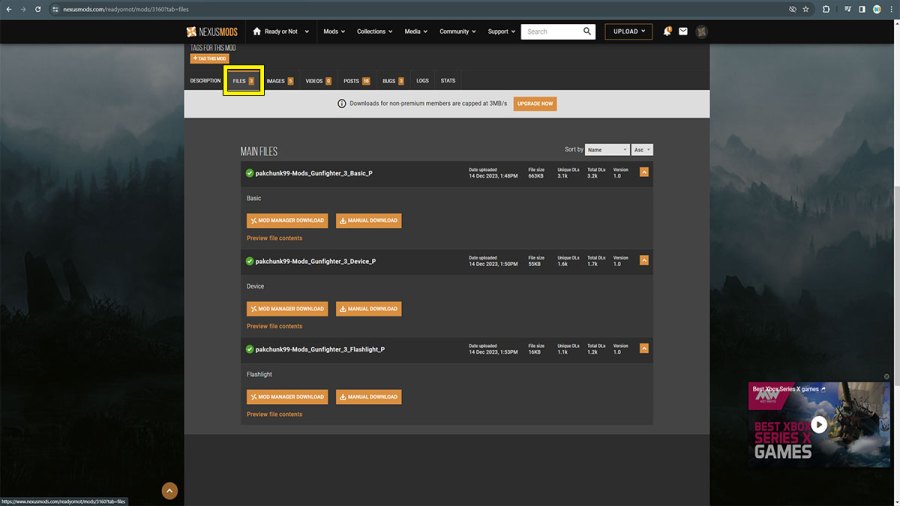
The Gunfighter Gameplay Improvement created by “isshinsama” was available for download directly via the in-game Mods menu in Ready or Not. This mod is now outdated and currently not recommended for use. However, user “NinomaeIsshin416” has uploaded theGunfighter Gameplay Improvement 3mod, which is compatible with Ready or Not 1.0.
The Gunfighter mod is now available on theNexusModswebsite and you may download ithere. Open the webpage and click on theFilestab as shown in the image above. Log in to your NexusMods account or register if you’re a new user to be able to download the Gunfighter mod files.

Related:How to fix Ready or Not ‘pak checksum mismatch’ error
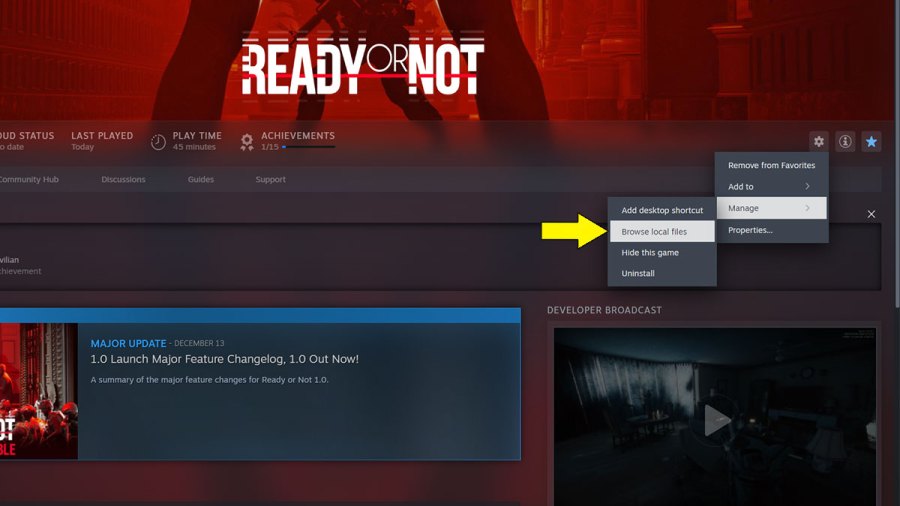
Once downloaded, you need toextractthe zip files andtransfertheir content to thePaks folderin the Ready or Not game directory. Below I’ve provided a step-by-step guide on how to do so.
When you restart your game, the Gunfighter Gameplay Improvement mod will be installed. Below is the description of the three files included in the Gunfighter mod and how they affect the gameplay in Ready or Not:
Stay tuned to Pro Game Guides for more Ready or Not content. In the meantime, you can visit our article onReady or Not DirectX 11 or 12 – Which one to use?