Poppy Playtime is a free-to-play, single-chapter game with additional DLC for each chapter. Chapter 3 is, personally, one of the most challenging. to get through this puzzle survival horror title, you might need a walkthrough.
How to complete Chapter 3 Deep Sleep in Poppy Playtime
So far, we have faced down some scary animatronic friends, but now we will have to contend with a new one named Catnap. Catnap has the power to put people to sleep, so this will come up in the future.
The Beginning
Once you drop in from the opening cutscene, you’ll need to head up the ramp to the left. Fall down between the bars in front of you, then walk forward until you’re able to’t anymore. The game will then prompt you to look up and grab the bar above you. The next room contains a simple jumping puzzle; hop along the tops of these giant pistons when they are in a straight line, then hop into the opening to the left. ensure tonot stay on the pistons that go upwardwhile waiting through the movement cycle; you’ll be crushed against the ceiling.
Related:All Poppy Playtime Chapter 3 Characters
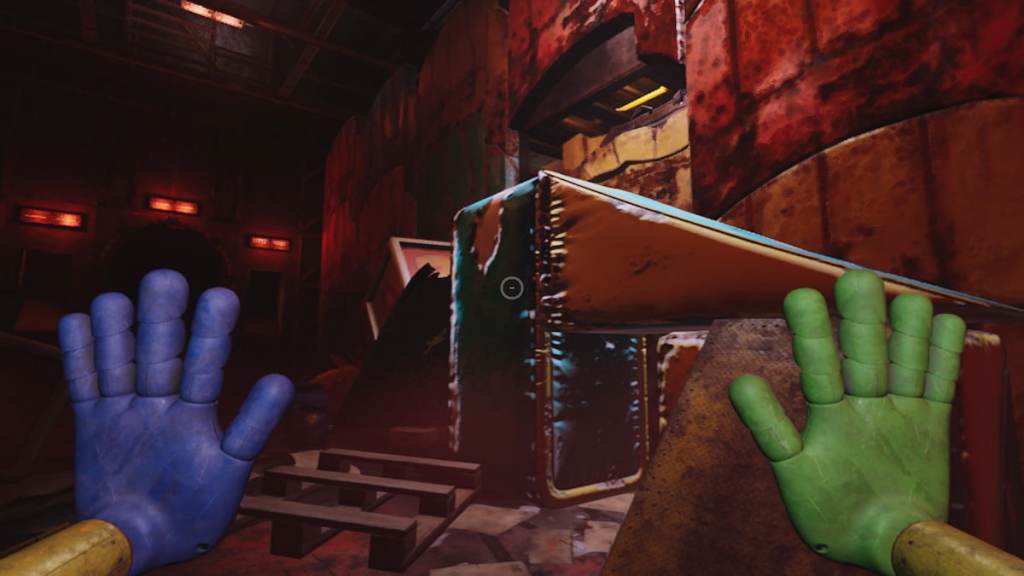
Duck through the hole in the wall immediately in front of you, then turn left and look for a door along the wall to the left. Press E to interact with it. Next up, you’ll be in a room with a slightly harder jumping puzzle; don’t stand on the pistons as they go down, or they will take you down into the nightmare gas filling up the room below. So you’ll have to jump all three of them to the middle platform, then jump the remaining to get to the ramp on the far side of the room.
Look to the right and find the grabbable platform; take hold of it and jump onto it while holding it. Let go to have it slide back across the gas.

Go through the ventilation shafts until you find your way into a room with a sofa and a TV; there is a VHS tape on the floor that you can grab and watch on the TV in the corner by the couch. On the other side of the room, there is an easy battery puzzle; using the two hands, pick up the two batteries (1, 2) and put them into the empty slots (A, B). Then press your hand against the hand pad to open the door.
Go through the door, then to the end of the hallway. Turn to the left, looking for the electrified hexagon. Use right-mouse-click to take green electricity with the green hand (it won’t work with the blue one), and take it across the hall to the triangular green electric button on the other side. The door won’t stay open long, so make sure to go through as soon as it is open.
Answer the ringing phone in this room, and the speaker will give you a battery to help you open the door. Go out through the door and walk down the tracks away from the fire. Toward the end of the train tracks, you will find a grabable handle in the ceiling to help you get up onto the train platform. The door labeled “Security” on the left side of the platform is the only door that is open, so head through that. There is another door in the back of the room that leads over into the locked “Maintenance” door. Here is the solution to the puzzle inside.
Into Playcare
At the top of the stairs is a tram; it will take you to the next area. You just need to pull the two switches on either side of the door into the tram. Then the doors will open, get in and ride it until the end. This will take you to Playcare; Ollie will come over the phone again to ask you to head down into the middle where the statues are. Head down the stairs into the power center. Inside, Ollie will have a key hidden inside a little cage. The key goes to the glowing, red door to the immediate left of the tram you took into this area.
The Gas Production Zone
Head inside the Gas Production Zone, then head through the door to the left. Inside, you’ll find a green battery. This can be used in the green port on the right side of the Gas Production’s main room. Make sure the battery color matches the port’s color. This will open the door next to the port; you may head inside to find a VHS (1) and a new, purple hand called the Grabpack 2.0 (2).
How that we have the Grabpack, we can head out into the main room and look on the floor to the left of the doorway unlocked with the green battery. There is a purple handprint on the floor you may use to launch yourself into the air and get up onto the balcony above you. Inside, you can look down and see a little Grabpack puzzle below. Head down there, using the Grabpack hand to push yourself through it. You’ll need to run to the handprint and use the purple hand to launch yourself over the holes in your path.

Next up, players will have to do a quick jumping puzzle with the purple hand. If you look across the red lake of gas, there is a grabable platform across the room. You need to grab onto the platform, bring it close, and then use it to jump on the pipes sticking out of the left wall. Turn around and grab the platform again, dragging it as far to the left as possible.
You should be able to jump over to the far side. Take hold of the platform and pull it all the way to you, then use it to hop over the wall. Still stuck? Check outthis YouTube videoto help get over the pit. This will put you into a room with another hand-connection puzzle. In order to solve it, you’ll need to:

The Exit leads you back out into the first room of the Gas Production, and the power is finally back to that giant button in the very center of the room. Press it, and the power will go out. Head back the way you came in from Playcare, back into the center under the statue, and find a new key in the little delivery cage where the previous key was found. This key is forHome Sweet Home, which is on the other side of the main area from the Gas Production Zone.
Home Sweet Home
The first thing you will be faced with inside of Home Sweet Home is a door filled to the brim with Catnap’s The Red Smoke. The only way out is through, unfortunately, is to run as fast as you can through the smoke. It’s really easy to get through this—you just need to run straight forward, through the door, and down the stairs. This will dump you into the maze that is the inside of Home Sweet Home. Go to the end of the hallway, then turn either way (both ways head back to the same place).
As you progress toward the back of the building, you’ll heara phone ringing; you need to find that phone and answer it, as Ollie has something super important to tell you:

Next, it’s time to run. Head back toward the entrance, and the lights will flicker. No matter which way you go, you’ll find yourself next to a door with very loud knocking. When you turn the corner from here, you will be face-to-face with Catnap for the first time. Walk toward him, and he will leave. This will lock you in a small circular area; walk back and forth until a way out opens up.
Once the hall opens again, there will be a room at the end of this hallway, but you are prevented from entering or interacting with it. Instead, just take the first left in the red-ish colored hallway. No matter which way you go forward after this point, all ways lead you to a location with atape(1) and a TV (2).

Play the tape, and a chase sequence will start. you may’t outrace him, but once he catches you, you’ll wake up in the room that is filled with The Red Smoke. Walk through the open doors, then look down into the hole in the floor. Using one of your hands,pick up the Gas Mask. You can equip it by pressing F.
Jump into the hole in the floor, then use a hand to interact with the back of the toy car. It will break down the boxes blocking the way out. Put on your gas mask, then move through this corridor until you find a handprint launch pad at the end.

Now, you’ll be in the Laundry Room. There will be a dresser blocking the way into the next room; you’ll need to use both hands at the same time to move it. Aim both hands at the handprint on the furniture, then click with both buttons to pull it back. Hop over the obstruction and head into the next room. Inside there, you’ll need to duck under the table blocking the door to get to the next location.
Use the blue hand on the pad by the door to open it. Immediately to the right inside the door will be a newtape, and the TV to play it will be in front of you when you open the door. After watching the video, head back the way you came, duck under the table blocking the door again, then go to the right through the hole in the wall. There will be a door opposite the hole in the wall in this room; open it up and walk through to see Catnap walking by.

Duck under the planks to walk through the door immediately in front of you, go through the hole in the wall to the right, and head into the door in front of you. I adjusted the settings in my game to make the screenshots a little clearer in this section as well.
Next up, you need to grab the two batteries to power the door to the next section. One of these is on the floor by the two battery ports, and the second is one floor up. Head over to where there is a live electrical wire hanging down from a hole in the ceiling and look up; there is a grabable bar on the ceiling to bring you into the sleeping area above.

Walk through the nursery into the next room; there will be a giant bear on the floor with a battery in its back. This will allow you to press the red button to the right of the battery ports to open the door to the stairs.
Go up the stairs and interact with the race car there. It will clear the way to the balcony of the main room of Home Sweet Home. To the right side of the balcony is an open door into a living room. Behind the sofa, there is a bookshelf you may open the door of to find aVHS tape(1) to watch on theTVthere (2).

Next, we need to switch to thegreen handto use thepower source(A). The socket for the power source is in the ceiling; it will open a door under the ceiling socket; you’ll need to be quick since the door doesn’t stay open for long. In the next room, there is a hidden power source and another socket in the ceiling. This opens the door on the opposite side of the room from the door you entered through.
The next room has a similar locked door to your left; you unlock it the same way. Hop on the giant blocks by the hole in the wall, and you will be able to see the power source from before. Use it on the port in the ceiling to open the door and move on.
In the next session, you’ll find a giant statue with a battery in the back of it. It will turn to face you no matter how fast you run, so you’ll need to go through the next rooms and sneak up on the side of it to get its power source. Go through the vent in this room to get to the next section.
The vent will bring you to the other half of the office you were in before; you’ll need the battery you are carrying plus one more. At one end of the hallway is this office, and on the other end is a door that requires two green charges. You’ll need to be quick for this section; you’ll need to open the door to the stairs, charge your green hand, put the power in the socket on one side of the closed door, then charge your green hand again in the office, run back, and charge the other side.
Inside this door is a room with another race car; pull its cord to break down the boxes on the other side of the hallway and go there. There are three rooms you can walk into; look for the one with the closed door that is filled with The Red Smoke. It will havea ventyou can go into.
This room will introduce you to the hand turrets; point the contraption at the button on the wall, then walk up to the turret and press E. Point the turret at the handprint on the contraption, then back out. To the right of the turret is a pull to turn it on; this will press the button, opening up the wall on the right.
Go into this room, then head to the end of the hallway and press the red button to ride the elevator up.
After Poppy leaves you, walk back to Home Sweet Home, grab the cord next to the entrance, and take it down into the central hub under the statues. Plug in the power next to the delivery tube. A new key will be delivered from Ollie. Use that new key to get into the School.
The School
The next location is the school. As you first enter, there is a brief power puzzle (if you get stuck, just keep opening up doors until you can see both the source and the port in the ceiling). After that, you can find a battery in the lounge area and then bring it to the office. There will be a second empty battery port, so you’ll need to head deeper into the school to find it.
Outside of the office with the battery ports, turn right and crouch under the desk there to get to the next area. There will be an open door to your right with a bunch of computers inside; there will be an open vent in the ceiling that will get you to the next location.
Go up into the vent; it will take you to the other battery, so you’re able to bring it back to the office and power up the power source. This will allow you to grab power with your green hand, head back out into the hallway, under the desk, and put the power in the triangular port next to the gate where Miss Delight disappeared. Just to the right of this gate, there is a VHStapeon the floor by the lockers (1); theTV(2) is inside the next room.
In the next room, you’ll need to grab each of the power buttons with each hand while also touching the pole nearby. Once you do that, it will start up the generator, and Delight will show up. She cannot move while you are looking at her, so you will need to go through all the rooms backward. Grab the battery from the floor before leaving this room.
A quick hint: the battery that is picked up in the beginning is needed to open the first gate, but you can pull it out of the port and take it with you to speed up the next part. For the most part, it’s just solving puzzles while Miss Delight follows you.
All Note Locations in the School
While inside, you may have seen a note or two. There are a total of six of these notes, located on the piano bench, hanging from an open vent in the ceiling, on an ottoman, next to the first battery, and just next to the door where you enter for the Miss Delight cutscene.
The final page can be found just after Miss Delight is killed. Look for a number pod in the hallway. If you don’t want to go and look for all of these notes, I have also included what is in each.
The Playhouse
Inside the Playhouse, you’ll come across a lot of tiny, animal-like characters.Shoot them with the orange handto keep them from attacking. There will be another TV in this first room; the VHS will be in the next room under a tent. Continue through the Playhouse maze on either side until you find two giant buttons; above them will be a block you can pull down onto it to keep it pressed down.
Once both buttons are on, you can proceed to the center to push the central button. The central button makes the round platform spin around, so stand on that platform, then press the button, which will bring you over to the door. Head in, then go down the stairs.
Once you listen to the last of the Smiling Critters tell his tale, a chase sequence will begin. You might have to do this one a couple of times because there is a massive critter chasing you and only one way through the maze of Playplace. If you can’t find the way out, it’s a hole in the floor back the way you got into the dungeon area (see the screenshot below).
At the end, you will need the purple hand to launch over a hole and take you to the next location. Ride the elevator up, then head down the tube to the left at the top. The end of this tube will put you back into the central Playcare space, and Ollie will finally be able to contact you again. He’ll send you back to the statue building once again to get akeyfor the office.
The Councilor’s Office
Inside the Councilor’s Office, you can find the first battery in the vent above the battery port. Take this battery, put it inside the port, walk through the door, and grab it through the door so you have a battery again. Use this battery on the port in the next room.
Next to the port in this office on the desk is anotherVHS tape. Open the door with the battery seen through the Red Smoke-filled room. Next up, pass by Eduardo Gala’s office and look for the hole in the ceiling with the grab bar at the top above the end of the hallway. This will take you to a new puzzle.
Next, we need to head into Stella’s office. There will be a VHS here as well as a TV to play it; you will need also need to open the vent in the ceiling to get the key for the next area. Go through the locked door, through the hallway, up into the ceiling with the grab bar, and into the vents. There is only one way through these vents, but ensure toput on your gasmaskbefore opening the end vent and falling into the room below.
In the next section, you will need to enter all three offices and open the power boxes. Grab the battery from the other port that can be seen through the hole in the wall, then power the power source, which isbehind the power box next to the battery port. Use the power source with all three power boxes to open the door, keeping your mask on the whole time. In the next room is a new contraption puzzle. to complete it, you need to:
In the next room, you need to hop up onto the boxes to the right to get into the vents. They will be filled with Red Smoke, so put on your gasmask. Go through the vents, grab the battery, and watch the cutscene. Next up, head out out of the Councilor’s Office, go down one set of stairs, and look to your right. There will be a cord to plug in below the statues in the center, then grab the key Ollie sends you.
Next, grab the cord from where you, Poppy, and Kissy took the elevator up before; it will have a flower painted on it. Plug that in under the statue as well, and Ollie will send you a blue battery. Take it into the Gas Production Zone.
The Ending
Plug the blue battery into the blue port in the Gas Production Zone, and Catnap will come after you. Get into the elevator on the other side of the room before he catches you! Press the big button (1) to open the elevator, then press the button (2) on the inside of the elevator to ride it up.
Last but not least, we have the boss battle. to win, you need to do several things. Read the instructions as they come onto the screen, gather all the batteries into the central location, and be ready to battle.
Catnap can come at you in several ways: the left side, the right side, and above. If he comes in from above, you just need to grab the bar of the door above and pull it closed. If he comes from the right, you will need to open the cage to the right with one of your left hands, then charge the green hand with the port behind you, and grab the power triangle port behind the door. If he comes from the left, you need to use the purple hand to vault over the top of the left side, then charge the green hand and plug the power into the port on the other side.
As the timer counts down, you will need to pull batteries from around the room and put them into the four corners of the machine in front of you as they light up. When the timer on the machine runs out, touch it with the green hand to finish the fight. Take the elevator back down into the Gas Production Zone and plug in the blue battery.
For more Poppy Playtime, check outAll Poppy Playtime Characterson Pro Game Guides.
